
Without participating in the Spiral Abyss trials, the player will not be able to fully close the content in Genshin Impact. Phased battles open access to various rewards and achievements. The instructions contain basic information on how to find and complete all the arenas of the Spiral Abyss, taking into the characters available to the average player.
What is the Spiral Abyss in Genshin Impact
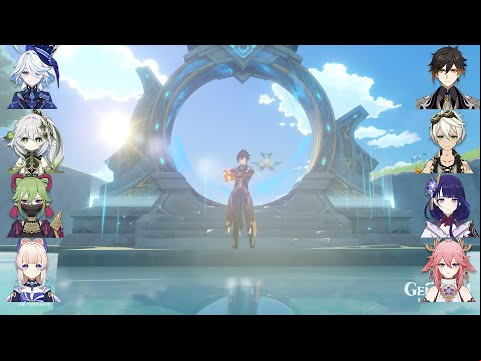
The Spiral Abyss is a special challenge zone that can be compared to the Endless Towers in modern mobile action RPGs. In practice, Genshin Impact features only 12 floors of the Abyss, completing which will give the player a large number of Primogems and other valuable rewards.
How to get to the Twisted Abyss
To access these challenges, players must open Reef Mask, and also have Adventure Rank 20 or more. You can get there from Cape Vera, which is located east of Mondstadt. However, the wormhole leading to the Reef, through which you need to go once (then just teleport), is high in the air. To unlock the wind current rising to such a height, you need to activate immediately three fairy statues.

Further, the screenshots from the interactive and game map show the locations of all the fairies, as well as the route of movement from Cape Vera to Mask Reef.

Once on the island, you can enter the Abyss if you meet all the conditions of the tests.
Test conditions in the Twisted Abyss
There are some peculiarities in ing levels in the Spiral Abyss. Standard characteristics and skills of characters are strengthened (or weakened) due to anomalies of the arteries of the earth and blessings.
Anomaly is a static buff that applies to every room within the same floor of the Abyss.

Blessing - This is one of three buffs offered to the player in each room to choose from. Blessings of blue apply to the entire floor, and brown only for the room. Naturally, the first ones should be chosen, unless, of course, they run counter to the strategy chosen for the detachment. It is also worth giving up healing bonuses, since they are simply not needed by a full-fledged squad with a heal.

In the Twisted Abyss must not (to the end of the floor):
- play co-op;
- use food and consumables from inventory;
- change squad;
- change weapons and artifacts;
- level up heroes or elevate them.
Upon reaching the 5th floor, you will have to collect two full-fledged squads, because you will need to the levels immediately in 2 directions. After completing the floor, you can exit to the Abyss menu and collect rewards.
What is Blessing of the Abyss
Each monthly cycle in the Twisted Abyss 16 number The buff common to all floors is changing - Blessing. This is a specific effect that can also affect the strategy of forming a squad and using characters in battle.

Current Blessing of the Abyss - Intertwined Moon. Each time the hero's elemental skill hits an enemy, a counter is kept (no more than 1 time every 0.9 seconds). When it reaches 3, a shockwave is released at the enemy's location, dealing true damage and resetting the counter.
How to get through the floors of the Twisted Abyss
At each stage of the test, players are waiting for special opponents. The level of enemies will increase, and the characters in the squad will have to be selected according to the elements against which you need to fight. We will tell you in detail about which heroes to put up for battle with opponents on each of the floors.
1 floor
| Parameter | Value |
|---|---|
| Enemies level | 25 |
| Anomaly buff | Pyro Damage +75%, Overload Damage +200% |
| Awards | Source Stones x300, Pestilence x75000, Adventurer XP x9, Wanderer XP x12, Enchantment Magic Ore x12, Dungeon Reliquary: Rank III x3 |
| Featured Characters | Pyro-heroes will give the most damage due to the buff and a large number of Electro-enemies, Anemo - will strengthen the elemental skills of the squad, Crio - will lower the protection of Electro-monsters |
Best Squad
| Character 1 | Character 2 | Character 3 | Character 4 | How to use |
|---|---|---|---|---|
 Diluc
Diluc  Xiangling
  Kli
Kli |
 Bennett
 |
 Venti
Venti |
 Qi qi
Qi qi |
|
Free Squad
| Character 1 | Character 2 | Character 3 | Character 4 | How to use |
|---|---|---|---|---|
 Ember
Ember |
 Keia
Keia |
 Traveler (Anemo)
 |
 Barbara
 |
The player will not have Pyro Resonance, but will be able to freeze enemies, as well as damage them with Steam and Melt. In general, a Pyro damage boost of 75% is enough to successfully close the floor. |
The Pyro hero at the head of the squad should be the main DPS. If possible, his attacks will charge Dispel skills. Heroes like Barbara or Kaya are needed to heal and control enemies, as well as to create additional elemental reactions.
2 floor
| Parameter | Value |
|---|---|
| Enemies level | 40 |
| Anomaly buff | Cryo Damage +75%, Freeze duration greatly increased. |
| Awards | Source Stones x300, Pestilence x75000, Adventurer XP x9, Wanderer XP x12, Enchantment Magic Ore x12, Dungeon Reliquary: Rank III x3 |
| Featured Characters | The whole battle strategy is based on the use of cryo-characters. With their help, you can freeze the Hydro-element monsters that prevail among the opponents on the 2nd floor. |
Best Squad
| Character 1 | Character 2 | Character 3 | Character 4 | How to use |
|---|---|---|---|---|
 Ganyu
Ganyu  Rosary
 Eola
Eola |
 Fischl
 Albedo
 |
|
 Zhongli
 Bennett
 |
|
Alternative Squad
| Character 1 | Character 2 | Character 3 | Character 4 | How to use |
|---|---|---|---|---|
 Xiao
Xiao Raizor
 |
 Chongyun
 |
|
 Sucrose
 Jean
Jean |
|
Free Squad
| Character 1 | Character 2 | Character 3 | Character 4 | How to use |
|---|---|---|---|---|
|
Keia |
Traveler (Anemo) |
 Lisa
Lisa |
Barbara |
|
3 floor
| Parameter | Value |
|---|---|
| Enemies level | 45 |
| Anomaly buff | Dispel damage increased by 300% and area affected by 100%. Anemo damage to party is 75% higher. |
| Awards | Source Stones x300, Pestilence x90000, Adventurer XP x15, Wanderer XP x18, Enchantment Magic Ore x12, Dungeon Reliquary: Rank III x2, Northerner's Spear Harvest. |
| Featured Characters | An Anemo character must be present in the squad, creating a vortex reaction of Scattering to absorb elements from other characters. |
Best Squad
| Character 1 | Character 2 | Character 3 | Character 4 | How to use |
|---|---|---|---|---|
Xiao
Ganyu Keqing
 Yanfei
 Ningguang
 |
Venti |
 Mona
Fischl
Mona
Fischl |
Zhongli Xinyan
Bennett
Xinyan
Bennett |
|
Alternative Squad
| Character 1 | Character 2 | Character 3 | Character 4 | How to use |
|---|---|---|---|---|
|
Xiao
Ganyu
Keqing
Yanfei
Ningguang |
Mona
Fischl |
Jean
Sucrose |
Zhongli
Xinyan
Bennett |
|
Free Squad
| Character 1 | Character 2 | Character 3 | Character 4 | How to use |
|---|---|---|---|---|
|
Traveler (Anemo) |
Ember
Keia |
Lisa |
Barbara |
It all comes down to accumulating energy from the Traveler to unload the ult into a group of enemies. Obviously, a status must be imposed, which will be absorbed by Dispersion in order to increase the elemental damage dealt. |
4 floor
| Parameter | Value |
|---|---|
| Enemies level | 50 |
| Anomaly buff | Squad member electro damage increased by 75%. The Charged status grants 150% additional damage, and the area affected by chain reactions is increased by 100%. |
| Awards | Source Stones x300, Pestilence x90000, Adventurer Experience x15, Wanderer Experience x18, Enchantment Magic Ore x12, Dungeon Reliquary: Rank III x2, Dungeon Reliquary: Rank II. |
| Featured Characters | Elemental reactions with Electro element damage well. However, taking into the main buff of the floor, it is worth paying attention not only to Electro, but also to the Hydro character in order to charge opponents more efficiently. |
Best Squad
| Character 1 | Character 2 | Character 3 | Character 4 | How to use |
|---|---|---|---|---|
Keqing
Raizor Beidou
 |
 Rosary
 Venti
Venti |
Qi qi Dione
Bennett
Dione
Bennett |
Sucrose Zhongli
 |
|
Alternative Squad
| Character 1 | Character 2 | Character 3 | Character 4 | How to use |
|---|---|---|---|---|
|
Xiao
Ganyu
Chongyun
|
Fischl |
Rosary
Venti |
Qi qi Dione
Sucrose
Zhongli
Bennett
Dione
Sucrose
Zhongli
Bennett |
The alternative lies in the fact that the detachment is built around Fischl. Her raven Oz will constantly apply the Electro status needed to develop maximum DPS. |
Free Squad
| Character 1 | Character 2 | Character 3 | Character 4 | How to use |
|---|---|---|---|---|
|
Keia |
Lisa |
|
Barbara |
In F2P, there is no alternative Electro character, so the squad will have to be built around Lisa. Her long-charged strikes and elemental skill hinder the squad's actions somewhat. However, under the exposed contour of the explosion of the elements, you can cause a lot of damage to the rest of the characters. |
5 floor
At this stage, a fork appears. Further guide will be written separately for each corridor. Free units will also disappear from it. Even if you get Noelle at a discount with banner for beginners, you will not be able to assemble two full-fledged battle groups.
| Parameter | Value |
|---|---|
| Enemies level | 55 |
| Anomaly buff | When the character's HP is above 50%, his attack and defense increase by 25%. When HP is above 80%, attack speed is increased by 20%. |
| Awards | Source Stones x300, Pestilence x105000, Adventurer Experience x18, Wanderer Experience x24, Enchantment Magic Ore x15, Dungeon Reliquary: Rank III x2, Dungeon Reliquary: Rank II. |
| Featured Characters | Obviously, at this stage, a constant heal is needed to ensure that all the buffs of the floor are received. We select characters for reactions that counter enemies in each of the corridors: in the 1st, Pyro damage will be needed, and in the second, Hydro. |
1st corridor
| Character 1 | Character 2 | Character 3 | Character 4 | How to use |
|---|---|---|---|---|
|
Diluc
Kli
Yanfei
Ningguang |
Venti
Albedo
Rosary
Chongyun |
Sucrose
Jean
Zhongli |
Bennett
Dione |
|
2st corridor
| Character 1 | Character 2 | Character 3 | Character 4 | How to use |
|---|---|---|---|---|
 Tartaglia
 Hu Tao
Beidou
Ningguang
Xiao
Ganyu
Hu Tao
Beidou
Ningguang
Xiao
Ganyu |
 Xingqiu
Mona
Albedo
Fischl
Venti
Xingqiu
Mona
Albedo
Fischl
Venti |
Sucrose
Jean |
Zhongli
Dione |
|
6 floor
At this level, Cryo enemies, in particular, jumpers and slimes, are waiting for the player on one side, and similar monsters, but already Pyro elements, on the second. You need to pick up units to fight with each enemy group.
| Parameter | Value |
|---|---|
| Enemies level | 60 |
| Anomaly buff | Using an elemental explosion increases the attack and defense of party by 6%. The effect stacks up to 10 times. When stacking 5 or more effects, normal attack and movement speed will increase by 30%. |
| Awards | Source Stones x300, Pestilence x105000, Adventurer XP x18, Wanderer XP x24, Enchantment Magic Ore x15, Dungeon Reliquary: Rank III x1 / Rank II x1 / Rank I x1 |
| Featured Characters | Blocking Cryo and Pyro damage on this floor will allow you to quickly destroy all opponents, in particular, annoying jumpers that bombard characters with AoE skills. Accordingly, it is not worth going into battle without a good shield. |
1st corridor
| Character 1 | Character 2 | Character 3 | Character 4 | How to use |
|---|---|---|---|---|
|
Hu Tao
Diluc
Kli
Yanfei
Ningguang |
Venti
Albedo Fischl
 |
Sucrose
Jean
Zhongli |
Bennett
Xinyan |
|
2st corridor
| Character 1 | Character 2 | Character 3 | Character 4 | How to use |
|---|---|---|---|---|
Tartaglia
Keqing
Raizor Ganyu
Chongyun
Rosary
Ganyu
Chongyun
Rosary |
Xingqiu
Mona
Albedo
Fischl
Venti |
Sucrose
Jean
Zhongli |
Dione
Qi qi |
|
7 floor
The seventh floor of the Spiral Abyss is entirely made up of Fatui Skirmishers. The main drawback of these enemies is probably their good healing if there is a Hydro Skirmisher in the group.
| Parameter | Value |
|---|---|
| Enemies level | 65 |
| Anomaly buff | Critical hits cause elemental particles and orbs to spawn. The effect does not occur more than once every 15 seconds. The crit power of all party is increased by 120%. |
| Awards | Source Stones x300, Pestilence x120000, Adventurer XP x21, Wanderer XP x30, Enchantment Magic Ore x15, Dungeon Reliquary: Rank III x1 / Rank II x1 / Rank I x1 |
| Featured Characters | We recommend focusing on the initial destruction of the enemies that control Hydro and Cryo-element. In trials with two healers at once, you need to create the maximum number of reactions in order to incapacitate fat people, preventing them from restoring each other. Against Cryo skirmishers, we choose Pyro-heroes, and against Hydro - Electro-heroes. |
1st corridor
| Character 1 | Character 2 | Character 3 | Character 4 | How to use |
|---|---|---|---|---|
|
Hu Tao
Diluc
Kli
Ganyu
Raizor
Ningguang |
Chongyun
Rosary
Fischl |
Sucrose
Jean
Zhongli |
Bennett
Xinyan |
|
2st corridor
| Character 1 | Character 2 | Character 3 | Character 4 | How to use |
|---|---|---|---|---|
|
Tartaglia
Xiao
Beidou
Yanfei
Chongyun |
Xingqiu
Mona
Rosary
Venti
Albedo |
Sucrose
Zhongli |
Dione
Qi qi |
Here, as in the case of the first corridor, everything rests on the boost of attack power and crits. Buffing heroes, shields and elemental reaction boosters will allow you to quickly deal with skirmishers. Again, it is worth using Cryo- or Pyro-resonance. When using Hydro-characters, it is desirable not to fall under the effects of freezing. |
8 floor
| Parameter | Value |
|---|---|
| Enemies level | 70 |
| Anomaly buff | When health is less than 60%, attack power and defense increase by 50%. When HP is below 45%, the speed of normal attacks and movement is increased by 30%. When HP is below 30%, the critical chance is increased by 20%, and the critical power is increased by 40%. |
| Awards | Source Stones x300, Pestilence x120000, Adventurer XP x21, Wanderer XP x30, Enchantment Magic Ore x15, Dungeon Reliquary: Rank III x1 / Rank II x1 / Rank I x1 |
| Featured Characters | Heroes should be selected based on the fact that in the first room they will have to shoot down the shields of the mages of the Abyss, and in the last one they will have to fight with Cryo Fern and Pyro Regisvine. |
1st corridor
| Character 1 | Character 2 | Character 3 | Character 4 | How to use |
|---|---|---|---|---|
|
Hu Tao
Diluc
Kli
Yanfei
Keqing
Beidou |
Fischl
Albedo |
Sucrose
Jean |
Bennett
Xinyan
Zhongli |
In the first room, quickly knock down the shields of the mages of the Abyss and destroy them. Then the Hilichurls and the Guardian of the Ruins will appear, which are much easier to kill. Controlling s make things easier. As for the flower bosses, they are no different from the game ones presented on the Teyvat map. Dodge attacks, then smash the blossom or fruit at the roots to deal damage to a fallen foe. |
2st corridor
| Character 1 | Character 2 | Character 3 | Character 4 | How to use |
|---|---|---|---|---|
|
Tartaglia
Keqing
Ganyu
Eola
Raizor
Rosary |
Xingqiu
Mona
Fischl |
Venti
Sucrose
Zhongli |
Dione
Qi qi |
The essence of the age is no different from the first corridor. Everyone also needs to knock down the shields of the Void mages, and then get to pyro orchids. The secondary DPS can either buff the squad or enhance the control functions. With the same goals, the first is selected. The last thing to do is to choose a good heal in order to save all the characters along the way and not waste floor buffs on restoring health. |
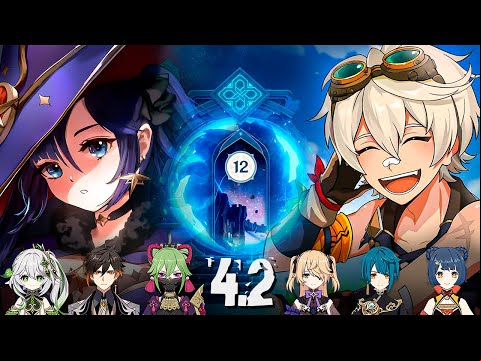
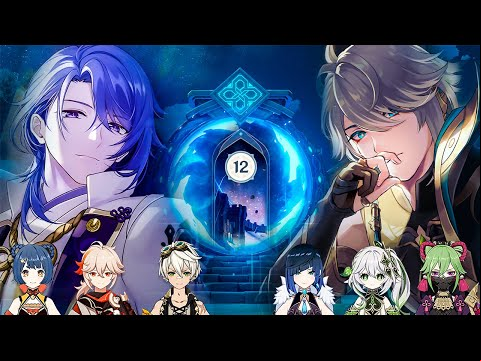
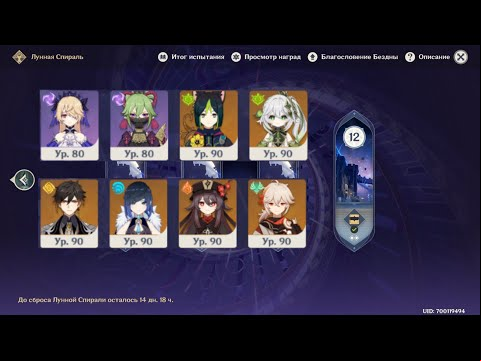
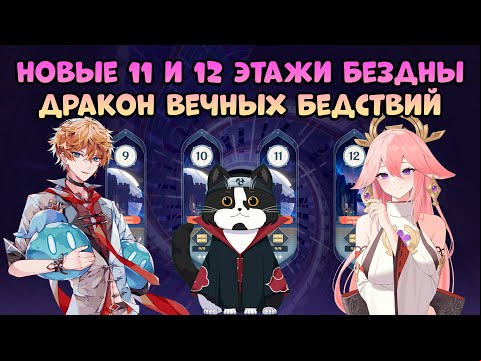
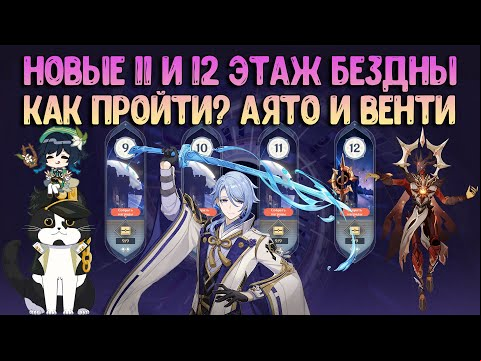
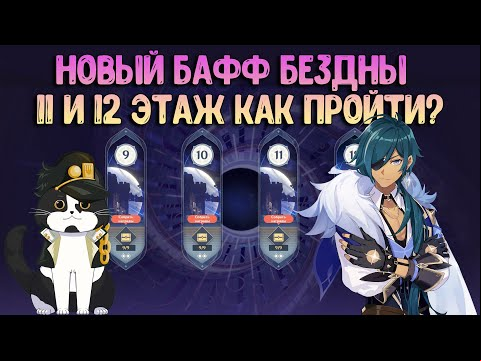
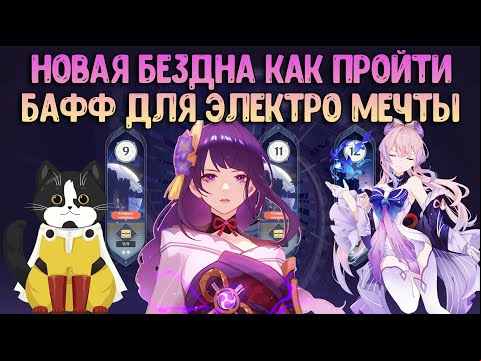
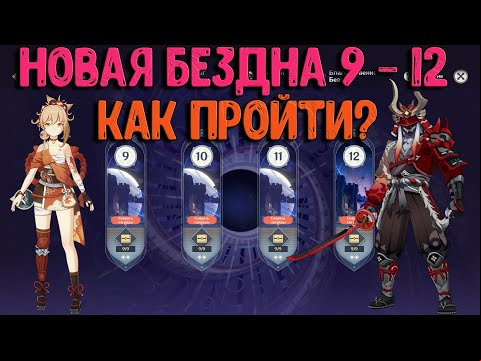
9-12 floors | Intertwined Moon
Information on the 9-12 floors of the Abyss, which are called the Lunar Spiral, is presented separately, because these levels are constantly updated. Every 16th of the month, the challenges for these floors change along with the general Blessing of the Abyss. After opening the Lunar Spiral, you permanently gain access to it in order to replay the upper levels with the beginning of the next Blessing of the Abyss.
Bookmark this pageto always have an up-to-date Lunar Spiral guide in Genshin Impact.
If you can't clear a certain floor with three stars, you can retake the challenges with another pack. Only the best rooms are counted for all completions, so the stars in them won't reset when you clear them again.
Past
Click on the title to open.


![[3.0] Spiral Abyss 9 floor / Витая Бездна 9 этаж](https://wotpack.cuevanamovies.net/wp-content/plugins/wp-youtube-lyte/lyteCache.php?origThumbUrl=https%3A%2F%2Fi.ytimg.com%2Fvi%2F-AfLt2W12cc%2F0.jpg)


11th and 12th floors.
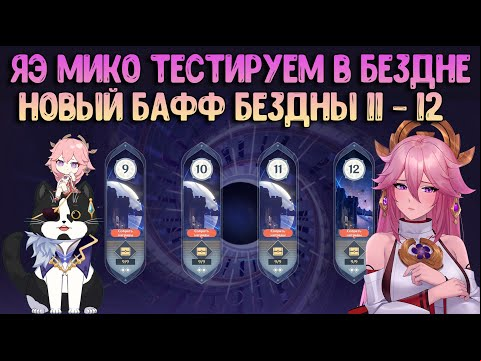
11th and 12th floors.
11th and 12th floors.

11th and 12th floors.

11th and 12th floors.
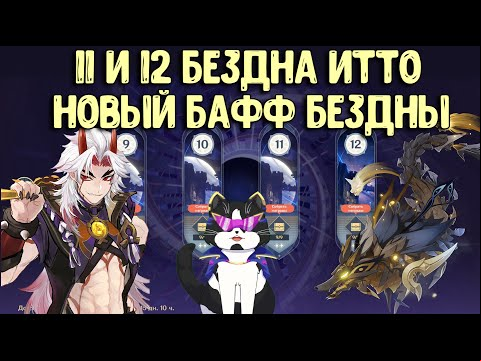
11th and 12th floors.

9 floor
Players who make it to this level of challenges will not only have to deal with anomaly buffs, but also debuffs that make it much more difficult to complete the challenge.
| Parameter | Value |
|---|---|
| Enemies level | 72-76 |
| Anomaly buff | In the rooms, the characters will constantly fill the scale of severe frost, and after reaching 100%, this effect will begin to cause damage to the hero. Enemies will attack the elemental Pyro Gear to make it harder for the characters to warm up. Restarting the operation of such a device will take some time. |
| Awards | Source Stones x150, Pestilence x120000, Adventurer XP x9, Hero XP x6, Enchantment Magic Ore x15, Dungeon Reliquary: Rank II x2 / Rank I x1 |
| Featured Characters | On one side, the floor is inhabited by cryo monsters, and on the other, skirmishers of Fatui live. In both cases, units with close builds with a DPS character and capable of quickly destroying ice and water shields will be relevant. |
1st corridor
| Character 1 | Character 2 | Character 3 | Character 4 | How to use |
|---|---|---|---|---|
|
Hu Tao
Diluc
Kli
Yanfei
Raizor |
 Venti
Fischl
Albedo
Xiangling
Venti
Fischl
Albedo
Xiangling |
Sucrose
Zhongli |
Bennett
Xinyan Dione
Qi qi
Dione
Qi qi |
In fact, it all comes down to the destruction of Cryo-shields and the opponents themselves by Pyro-characters. Secondary DPS and s with dispel can boost elemental reactions. If Venti, Sucrose and other Anemo characters are not available, then you can collect the usual combat reactions - Overload, Melt, Crystallize. Be sure to take a good healer to the squad from among those who are proposed for the position of the fourth character. Bennett would be the best choice as Boosts the damage of other Pyro-heroes in the squad as much as possible. |
2st corridor
| Character 1 | Character 2 | Character 3 | Character 4 | How to use |
|---|---|---|---|---|
|
Hu Tao
Diluc
Kli
Yanfei
Xiao
Ningguang |
Venti
Fischl
Xiangling
Ganyu
Keia |
Sucrose
Zhongli
Xinyan |
Bennett
Dione
Qi qi |
Again, Pyro characters will be great DPS. You can choose Xiao and Ningguang, because they will simply distance themselves from the attacks of the skirmishers due to their own dynamism and screen, respectively. In the position, it is desirable to have both a shield owner and a good healer. |
10 floor
| Parameter | Value |
|---|---|
| Enemies level | 80-85 |
| Anomaly buff | In the rooms, the characters will constantly fill the scale of severe frost, and after reaching 100%, this effect will begin to cause damage to the hero. In this case, warming elements will appear on the battlefield, which must be approached. to clear the scale. |
| Awards | Source Stones x150, Pestilence x135000, Adventurer XP x9, Hero XP x6, Enchantment Magic Ore x18, Dungeon Reliquary: Rank II x2 / Rank I x1 |
| Featured Characters | The floor is again filled with Cryo-characters, like the previous one. You should have a good Pyro DPS or other character that quickly knocks down shields. The advantage is that it is easier to warm up than on the 9th floor. |
1st corridor
| Character 1 | Character 2 | Character 3 | Character 4 | How to use |
|---|---|---|---|---|
|
Hu Tao
Diluc
Kli
Xiao
Raizor
Ningguang |
Venti
Fischl
Albedo
Xiangling |
|
Bennett
Xinyan |
All characters play on the main DPS, ing elemental reactions, creating shields and healing the squad. It is only necessary that the group has a Pyro-hero capable of inflicting high damage on Cryo-shields. |
2st corridor
| Character 1 | Character 2 | Character 3 | Character 4 | How to use |
|---|---|---|---|---|
|
Hu Tao
Diluc
Kli
Yanfei
Ningguang |
Albedo
Xiangling
Ganyu
Rosary |
 Jean
Sucrose
Xinyan
Jean
Sucrose
Xinyan |
Bennett
Dione
Qi qi |
The combat strategy for the second corridor on the 10th floor is actually no different from the first. Here, on the first two levels, there is a more diverse selection of opponents, not all of which have a shield, so it is somewhat easier to deal damage. |
11 floor
In this part of the Lunar Spiral, we recommend that you pay closer attention to the second squad, because. in the last room you will have to fight with two Heralds of the Abyss.
| Parameter | Value |
|---|---|
| Enemies level | 88-92 |
| Anomaly buff | Characters will periodically be affected by the effect of slowing down from being in water. If you do not remove this status, the cooldown of active skills will increase. At the same time, all of the squad deal 75% more physical damage. |
| Awards | Source Stones x150, Pestilence x150000, Adventurer XP x12, Hero XP x6, Enchantment Magic Ore x18, Dungeon Reliquary: Rank II x2 / Rank I x1 |
| Featured Characters | Given the lack of clear resistances for opponents in the rooms of the 11th floor, you can create two full-fledged squads with pronounced elemental tendencies. There is no need to knock down elemental shields here, except for those created by Fatui skirmishers. With the latter, a two-handed sword in the hands of a good damage dealer will help to cope. |
1st corridor
| Character 1 | Character 2 | Character 3 | Character 4 | How to use |
|---|---|---|---|---|
|
Hu Tao
Diluc
Kli
Yanfei
Ganyu
Raizor |
Venti
Albedo
Xiangling
Rosary |
|
Bennett Dione
Qi qi
Dione
Qi qi |
In this case, the DPS can easily deal damage, dodging the active skills of the enemy. Secondary damage and s are needed to create reactions, heal, buff and apply shields. Scattering will help a lot in getting through the initial rooms, where there will be a lot of small enemies. |
2st corridor
| Character 1 | Character 2 | Character 3 | Character 4 | How to use |
|---|---|---|---|---|
|
Eola
Ganyu
Xiao
Raizor
Beidou |
Rosary
Fischl
Albedo Xingqiu
Chongyun
Mona
Xingqiu
Chongyun
Mona |
|
Dione
Qi qi |
Cryo and Hydro characters form the basis of this build, as they are the ones that are effective against Heralds of the Abyss. There will be no problems with the enemies preceding the mini-bosses. It is advisable to follow the principle of choosing a hero with a shield and a good heal in the squad, while receiving Cryo-resonance for crit damage. |
12 floor
| Parameter | Value |
|---|---|
| Enemies level | 95-100 |
| Anomaly buff | There are no buffs or debuffs. |
| Awards | Source Stones x150, Pestilence x135000, Adventurer XP x9, Hero XP x6, Enchantment Magic Ore x18, Dungeon Reliquary: Rank II x2 / Rank I x1 |
| Featured Characters | This time, you'll have to face the full range of powerful opponents - from elemental jumpers and geowishaps to Oceanid Hydro creatures and two Void Lecturers. You will need two directed units capable of destroying specific targets. |
1st corridor
| Character 1 | Character 2 | Character 3 | Character 4 | How to use |
|---|---|---|---|---|
|
Eola
Ganyu
Raizor
Ningguang |
Venti
Albedo
Rosary
Xingqiu
Mona |
|
Dione
Qi qi |
Physical DPS is one of the main squad conditions in the first corridor of the 12th floor of the Abyss. With the help of these heroes, it will be easiest to destroy Geovishaps, as well as deal damage to the Lecturers of the Abyss. Hydro and Cryo characters are effective against the Electro Element boss. Dispel can increase elemental damage, and Zhongli will protect any hero from incoming damage. |

2st corridor
| Character 1 | Character 2 | Character 3 | Character 4 | How to use |
|---|---|---|---|---|
|
Hu Tao
Xiao
Ganyu
Diluc
Kli
Yanfei |
Venti
Fischl
Xiangling
Xinyan
Rosary
Chongyun |
|
Bennett
Dione
Qi qi |
The Cryo and Hydro enemies in the second corridor are cleared with a good Pyro DPS. If you don't have this, then you need to add the appropriate secondary damage dealers and s to the squad. It will be useful to have an Anemo-hero with dispel and a good heal. |
Awards
If in the previous season you were able to close the 11th or 12th floors of the mode with three stars, then next time you will be able to skip the 9th or 10th level, respectively. This will allow you to quickly collect some of the rewards and not waste time on clearing the first rooms again.
In total, for completing the Twisted Abyss, taking into the Lunar Spiral of one cycle, you can get 3200 primogems. Repeated age of floors 9-12 will also bring 50 source stones for every 3 stars + 50 primogems for completing each floor with all stars. Accordingly, approximately every 30 days you can receive another 800 primogems from the Abyss, even if all floors were closed earlier. There are other rewards listed in the sections above, the total number of which is enough to level up your characters and weapons well in Genshin Impact.
Every 16th day of the month we change the guide to floors 9-12 of the Abyss in accordance with what monsters and bosses are located on these levels. Bookmark this pageto always know how to assemble a squad for the next cycle of the Lunar Spiral.
Damn... I don't have that many legions. Please advise! How to assemble two squads, and I will write the legion characters present. Mavuika, Shilonen, Mualani, Kinich, Diluc, Keqing, Furina, Tignari (all of the listed characters at level 90) and DEHYA WHO DROP INSTEAD OF RAIDEN at level 60.... Would you advise adding 4* characters there and assembling two squads. Of course, there will only be one Cannon squad. With Mavuika and her signa. And the second squad... how to take it out?:
4* characters are all except Freminet, Beidou, IFA!, Setos and I apologize XING QIU WHO HAS NOT FALLEN FOR 2 YEARS
Please the video to a friendly hosting service.
Hello, tell me how to beat the wolf in 12.3, I take Nevi c0 with the Raiden Nahid and Jun Li signature, but in the end the wolf takes 2 minutes, which is why I can't defeat the dragon in the second half. In the second half I put Arlie Bennett Xinqiu and Elan. I'm about 20 seconds short of finishing off this dragon. Please help somehow.
I suspect that it is not possible to quickly remove the shield from the wolf? If so, then when the wolf throws out 3 totems, you need to run up to the totem point-blank as Jun and press E (eIf you don't get close enough to the totem, the column may collapse). 2/3 of the circle should be filled and you can run to the next totem. Column Pulse will finish off the totem. Repeat 3 times. Jun's ult immediately destroys one totem, so it's better to save it for this.
Hello, if you put Nevi, Shilo, Furina, Kazakh in the 1st corridor
And Arle, Xingqiu, Bennett (c6) and Zhongli in the second, will it be possible to the abyss?
Hello. In general, yes, the packs are suitable, the only thing is that it can be difficult with the Dragon of Eternal Calamities in the 3rd hall without an archer. For Harlequin this time they take Fischl or Ye Lan. That is, you can take Harlequin + Fischl or Ye Lan + Xingqiu, Zhongli, Chevreuse, Bennett.
Keep in mind that after 15 seconds there will be a shield-piercing attack on the Twilight Papilla. To have time to remove the shield before you need either Ororon, or Fischl with a Hydro teammate, or at least Xingqiu with someone. Of the elemental reactions, the shield of this boss is more or less destroyed by reactions with Dendro (burning and vegetation) in addition to the mechanics of the night spirit.
It might be easier to do something like:
Nevillet, Furina, Kazuha, Zhongli
Harlequin, Shilonen, Bennett + Xingqiu / Fischl / Ye Lan
And it might be easier to swap the packs, although they usually go in your order.
Authors, I heard from Miron min max that when ing the 12th floor, the abyss re the best result once or something???…. Well, for example, maybe I didn’t understand correctly, can you explain, please, and add it to the article? Because I’ve been playing for two years, and this is the first time I’ve heard this. This can make ing the abyss easier. ( https://www.youtube.com/watch?v=4DUlqomzyYQ&ab_channel=MironMinMax) 17: 36
Hello. Yes, that's right. I'll try to explain with an example.
You can close 1 hall with 3 stars, 2 halls with 3 stars and 3 halls with 1 star with one squad composition.
Then you start over with other teams, go 1 on 1 star, 2 on 1 star and 3 on 3 stars. After this second run, the score of the 3rd hall is counted as 3 stars, and for the previous ones it is not reduced, as a result the sum for the floor is 9 stars.
Thank you. It often happens that one of the halls is impossible to with an active squad. And this will significantly simplify the task
Yes. And we agree with your proposal, we will add this point)
I don't know what the developers were smoking in this update, but 12-2-2 became imable for me. I tried to with C1 Arle under overload, I barely closed it with Raiden, changing to Fishly immediately the difficulty. And without Fishly you can't the next floor, it's terrible
12-2 is the only thing we've managed to get through so far. First half: Neva s1, Fishlya, Nahida, Ded. Second half: Navia, Ye Lan, Siny, Shilonen
The same thing - Raiden Fischl Syanka and Chevrez overloaded. Papile didn't have time to knock down the shield, so he retreated and waited, and then flew in and hit)) But under Arli here, Elan would be just super, both in of the amount of elemental damage and under the vape. Well, plus Elan would knock down the dragon. And yes, Fischl helped out. With this squad, I closed with 9 stars.
Hello, I collected the reward for the 9th floor automatically. Then I completed 10 and 11 myself for all the stars, but only 9 is listed in the BP, I can’t collect the reward. Can you please tell me, with the new system, only those stars that you collect automatically go to the BP?
Hello, logically, all the stars should go and certainly the ones that you should be counted first, as it has always been. I myself ed the Abyss completely to the 12th floor in the last cycle before November 16 and in the current one I automatically took the rewards for the 9th and 10th floors - while in the current bp, on the contrary, the reward for 12 stars has already been counted. Most likely, it sounds like a bug, but if something is found, I will try to write to you about it.
Thank you!
I have the same problem.... Have you found a solution? I don't know what to do (
Sorry for the question, but it says "Repeated completion of floors 9-12 will also bring 50 source stones for every 3 stars + 50 primogems for completing each floor with all stars." I completed 2 floors again and got nothing. Has this requirement been cancelled? Or do I have to complete the Abyss first?
This means that since floors 9-12 are updated and intended for repeated age, there is a one-time reward for stars in each cycle.
I still don't get it. I completed floors 9-10 with all the stars and got rewards. But when I re-complete them, they don't give me anything else. What update are you talking about? Or are you just completing them without stars and then getting stars?
ah, got it. I mean the reward for each cycle.
Then the word "repeated" is not very correct, because it implies that the floors do not change. It is a bit confusing.
Thanks for the answer
I'm glad to help, we'll try to clarify in the article
f***ed up in the new abyss, the 11th floor is complete darkness.
Skara's pyro-electro round is dragged into the lung. To him is Farah, of course, a shield and someone else. Overall this team is great. Next is hell.
To get through the ice, this is a disaster. In short, it wouldn’t hurt to have someone for a screed like Venti or Sucrose or Kazuha, and Xiangling also pumped them up for both damage and recovery. Tightening and breaking shields, accordingly, is what we require from them. It is the shield on the ice slimes that is the most terrible because of which you do not have time to finish on time. If these guys exist, then I recommend a working option. The downside is that you may not be able to take a healer. But this is not a problem, the next 2 floors can be dragged without it. If you finish the first round quickly, in the second just run, dodge and finish, there will be enough time. It may also take a couple of tries, but this hall is much easier than the first one. By the third hall you will get used to keeping an eye on the presence of the shield, I ed on the first try.
In the second hall and round 2 (floor 11 hall 2 round 2) there will be strong hydro devils. So, without any options, as for me, I need a strong pyro damage dealer. Maybe electric, but I don't have that.
My team for the second halls consisted of a shield warrior + Yoimiya + Kazuha + Xiangling.
Clarifications:
*Unfortunately, I have Layla’s shield. Usually it’s very good, but for this floor it’s generally too bad.
*Perhaps there is a reason to replace her with Zhongli, but I even went hardcore with Layla)). This is a note for those who are as dumb as me.
Bottom line:
In general, I ed with three stars, but on the 15th attempt. For the first time in a year, it took more than two attempts at this hall. Very sweaty.
Learn to master the elements guys, don't be like me lol.
By the way, bonuses in the abyss were increased, for the third hall 100 stones.
Pure Darkness begins on the 12th floor
play from the elements, that's right. it won’t go right through)
Lila, one of the shield men, doesn’t take it out, they quickly break the shield.
I'm playing as Layla on the 12th floor. Everything is fine there and she can handle everything!
Well, it’s extremely heavy, but if you have Furina, you can get through it. Only because I’m bad at reacting there I only take up to 5 stars =(
Six is really a lot to try for me, well, it’s not worth the nerves, it’s better to learn the basics, and if you’re too lazy, just endure it =(
Hello everyone. Tell me, what kind of “miracle” is this, when according to the stats of art there is no more than 110-130% recovery, and in general according to art, it’s almost 300% How’s that? In addition, with the settings of an Autobot, or according to them - AI, in dungeons right now more falls on AP and health, attempts to catch up with the same crit are more failed than successful, especially when harmful arts fall (in which the alteration is made (that is, the AI plays with the player), and in an arbitrary manner) SPs
Why are the blessings on the top floors different? For example, yesterday I had one of the three for attack power + 20 percent and today for VE + 20%. Although the abyss has not yet been updated
Those that are given at the beginning to choose from seem to be random
Gym bonuses change every day, so you can try to complete the Abyss on another day if it doesn’t work out. The bonuses will be the same if you click “Leave Away” and then return to the age.
Thank you, I didn't know about this 😅
Is it time to update the article? My Nahida was not used on this page?!
Hi all. I have only one question, what to do if you are on the 3rd floor of the 2nd hall, killed the entire squad except for one Keii and now we can’t get through
Pov: before I went into the dungeon, I did not know about the existence of this channel)
Hello! If you have killed a character (or several) on a certain floor, then you can replay this floor. To do this, once again entering the Twisted Abyss, click "leave the test." Then select the desired floor again (don't worry, you won't have to start from the 1st floor, in your case you will need to start from the 3rd floor of the 1st hall) and try to go so as not to lose the heroes 🙂
there’s just a “restart” button there, why make it so complicated?
a normal squad on the 6th floor?
Yanfei Xinyan Bennet Collei
Diona Lisa Nahida Sayu
Greetings! Tell me what units can be made to the 12th floor
List of available characters:
Ganyu
Xiao
Ayaka
Raiden
Xiangling
Dione
Bennett
Diluc
Qi qi
Mona
Sucrose
Fischl
Barbara
Xingqiu
Lisa
Chongyun
Xinyan
Ember
Itto
Keqing
Yun Jin
Ningguang
Noelle
Heizo
Sayu
Keia
Sarah
Beidou
Raizor
Yao Yao
Collei
Candace
volumes
Yanfei
Dory
I would be very grateful for an answer
cool, my video was added as an example of the walkthrough
Tell me, are the norms for detachments under the Abyss?
1. Ganyu, Shen He, Beidou, Sucrose
2. Tartaglia, Bennett, Qiqi, Fischl
Help with units for the abyss is needed. I can not 12 abyss only go to all the stars. lvl 90: gan yu, kazuha C1, albedo, eloa, hu tao (7-10 talents)
80lvl: xing qiu, xiang ling, bennet, dione (talents 6-8). I ed the first hall with 3 stars, but I can’t do the rest. ATP huge if someone answers
So how can I help you? Or Cryo-Pyro (Bennett, Xiang, Gan, Diona) It’s probably understandable to play with this pack, but by the way: Dione on shields and ult, then Bennet’s clearing, Xiang’s ult + Gan hey in Bennet’s clearing.
Or Hydro-Pyro (Hu Tao, Bennett, Xingqiu, well, you’ll close the resonance here, you can take Kazuha for inflating, as you like.
And with the second pack xs what to invent. Well
Let's say Hu Tao, Bennett, Xingqiu, Albedo
And in the second: Ganyu + Dione + Xiang + Kazakh
Or for example: Aeola + Bennet + Dione + Albedo
+ Hu Tao, Xiang, Kazakh, Xingqiu in the second
I know the post is older than my great-grandfather, but I need help.
I want to level 9-12.
Level 90 available: Raiden, Yanfei, Barbara, Keqing, Ayaka, Dilyuk, Sayu, Xingqiu, Dione.
How to assemble a squad and who is better not to take?
on floors 9-12 I assemble a Pyro pack in 1 half and Hydro / Cryo with a screed in the second. in the 1st under Dilyuk you can Yanfei, Xingqiu and Sai. in the 2nd Ayaka, Dion, Raiden and Keqing for example. or Yanfei, Raiden, Xingqiu, Sayu and Ayaka, Dion, Diluk and Keqing. try to watch the heroes from the video or maybe collect more s, otherwise you have only DD.
Well, yes, going through the abyss with Kazuha is a pleasure. Of course, this is all cool, but what if there is no Kazuha, and a screed is needed in two corridors at once?
take other characters with a coupler 🙂
the same problem, no kazuhi, no genie, no venti, dragging on sucrose solo
Does the genie tighten? 0.0
Yes
“The instructions contain basic information on how to find and go through all the arenas of the Vita Abyss, taking into the characters available to the average player” - in the guide for 9-12 people, he takes 5 * event Persians, useful, thanks
It is specially written that you will not have enough free characters for 2 corridors (starting from the 5th floor). And no one will walk with free heroes up to 9-12 floors. Even the fiercest F2P will bring you a few characters to dilute those squads. If you have risen to such a level of the Twisted Abyss, then you can definitely embed 1-2 pumped free heroes in place of the missing event ones.
Again, the guide contains not only 5 *, look carefully. Almost every position can be matched with 4 *, dropping out much more often.
Show me any 4* who can endure the same as Eula on the video)
This, of course, is an interesting challenge, but I won’t risk comparing heroes) However, according to all the reviews before and after the release of Eola, Razor is the second after her, who gives huge physical damage. Again, do not forget that this is only a universal type of damage, but you can select heroes according to the principle of complete elemental counter.
But, I by no means argue that Eola is currently the most powerful character in of one-time damage. You just need to disperse it to these values.